
Fiber optic cables are the backbone of modern high-speed internet, television, and communication systems. Designed to transmit data using light pulses, these cables offer exceptional speed, bandwidth, and reliability. Despite their durability, fiber optic cables can suffer from physical stress, environmental factors, or installation errors that lead to signal degradation, disconnections, or slower performance.
Whether you’re a homeowner troubleshooting home internet issues or a technician managing a larger network, knowing how to diagnose and resolve problems in fiber optic cables is crucial. With a structured approach and the right tools, you can quickly identify faults, restore connection quality, and prevent further damage, saving time, money, and frustration.
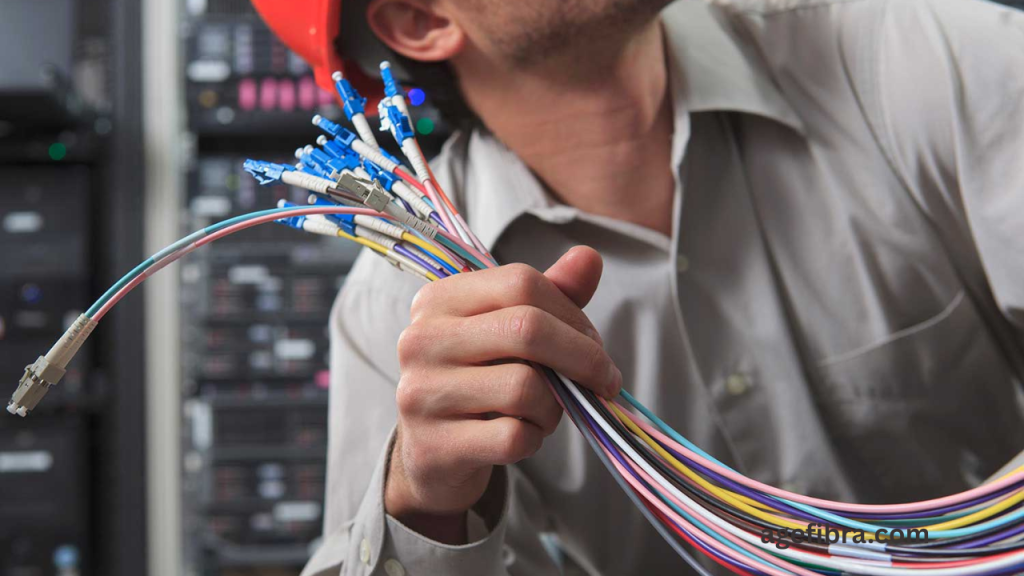
Understanding Fiber Optic Cables
Fiber optic cables consist of tiny glass or plastic fibers that transmit data as light. Unlike copper cables that rely on electrical signals, fiber optics offer higher bandwidth, longer transmission distances, and greater resistance to electromagnetic interference. These benefits have made fiber optic cables central to modern communication systems, from home internet to data centers and telecom infrastructure.
Despite their resilience, fiber optic cables can suffer from physical damage, connector faults, or environmental wear. Knowing the structure and working principles helps diagnose these problems accurately.
Common Causes of Fiber Optic Cable Damage
Physical Stress and Bending
One of the most common issues is excessive bending or pulling of the cable. Fiber optic strands are incredibly thin and can snap or degrade if the bend radius is too tight.
Environmental Exposure
Outdoor fiber installations face threats such as moisture, rodents, UV exposure, and extreme temperatures. Over time, these elements can break down the cable’s outer sheath and affect internal fibers.
Poor Installation Practices
Improper cable routing, tight zip ties, or forced connector insertions can lead to microbends and fractures that disrupt signal flow.
Connector Contamination
Dust, oil, or microscopic debris on fiber connectors can block or scatter the light signal. A tiny smudge is enough to weaken performance or cause a complete disconnect.
Read More: Fiber Optic Splicing Types, Methods, and Applications Explained
Step-by-Step Guide to Diagnosing Fiber Optic Cables
Step 1: Inspect the Cable Visually
Begin by checking the entire visible length of the fiber optic cable. Look for visible cuts, abrasions, or bends sharper than the cable’s minimum bend radius. Damaged outer jackets or tightly pinched sections are red flags.
Step 2: Check the Connections
Ensure that the cable is securely and correctly connected to both the source and the device. Unplug the connectors gently and inspect for any signs of damage or dirt. Clean with a proper fiber optic cleaning kit if needed.
Step 3: Test Light Transmission
Use a visual fault locator (VFL) or fiber optic light source to detect breaks or severe bends. A visible red laser shining through the cable helps identify where light is escaping, indicating a problem area.
Step 4: Measure Optical Power Loss
An optical power meter, combined with a calibrated light source, can measure how much light is being transmitted through the cable. Higher-than-expected loss suggests connector issues, splices, or internal fractures.
Step 5: Use an OTDR (Optical Time Domain Reflectometer)
For long cable runs or buried fiber lines, an OTDR is invaluable. It sends light pulses and analyzes reflections to pinpoint fault locations, bends, splices, and end-to-end losses.
How to Troubleshoot and Repair
Clean Connectors and Interfaces
If contamination is the issue, use fiber-specific alcohol wipes and lint-free swabs to clean the ends of connectors and equipment ports. Avoid touching the fiber tips directly.
Replace Damaged Sections
In case of severe physical damage or signal loss, replacing the affected section of the fiber cable is often the best solution. Use proper splicing methods to join fiber ends securely.
Re-terminate Connectors
If connectors are worn or broken, you may need to cut off the end and attach a new one using a mechanical splice or fusion splicing, depending on the setup.
Eliminate Bend Stress
Re-route the cable to reduce tight loops or sharp bends. Use fiber routing accessories that maintain the proper bend radius.
Common Causes of Fiber Optic Cable Damage
Physical Stress from Bending and Pulling
Fiber optic cables are sensitive to sharp bends and excessive pulling. These actions place stress on the thin optical fibers within the cable, causing fractures or microbends that interfere with signal transmission. Maintaining the proper bend radius is essential to prevent performance degradation.
Environmental Wear and Tear
Exposure to moisture, heat, rodents, and UV radiation can damage fiber optic cables over time. Outdoor installations are especially vulnerable, and even protective outer jackets may degrade if not properly shielded. Regular inspection and protective casing help reduce environmental impact.
Faulty Installation Techniques
Improper cable routing, tight zip ties, or forced connector insertions during installation can introduce long-term damage. Such mistakes may not cause immediate failure but often lead to issues down the line, such as poor signal quality or connection loss.
Dirty or Damaged Connectors
Even tiny particles of dust or oil on the fiber connectors can block the light signal. Contaminated or scratched connector tips often lead to data loss or complete disconnection. Proper cleaning and handling protocols are crucial to maintaining signal integrity.
Tips for Preventing Future Damage
Use Proper Routing and Placement
Routing fiber optic cables in safe, low-traffic areas helps avoid physical damage. Cables should not be crimped under heavy furniture or exposed to direct sunlight or heat sources. Utilizing cable trays and supports ensures secure and organized placement.
Protect Outdoor Installations
For outdoor fiber runs, using conduit or protective tubing shields the cable from weather, pests, and accidental cuts. These precautions extend the cable’s life and improve overall performance stability over time.
Maintain Clean and Secure Connections
Ensuring all connectors are clean and tightly secured at endpoints helps prevent intermittent signal issues. Using dust caps when cables are unplugged and cleaning interfaces before reconnection significantly reduces contamination risks.
Document and Label Installations
Clear labeling and documentation make future maintenance more manageable. Identifying cable paths, connection points, and installation dates can help technicians quickly isolate and repair issues without unnecessary guesswork.
Mistakes to Avoid While Diagnosing
Relying Solely on Tools Without Inspection
While testing equipment is essential, skipping a physical inspection often leads to overlooked issues. Visually examining the cable path, connectors, and installation area is a critical first step.
Using Incorrect Cleaning Materials
Common household cleaning items like tissues or fabric cloths can leave lint or cause scratches on delicate fiber connectors. Only fiber-specific alcohol wipes and lint-free swabs should be used during cleaning.
Forcing or Pulling Cables
Pulling cables during installation or testing can cause invisible internal damage. Technicians should avoid applying force when inserting connectors or adjusting cable placement to prevent stressing the fibers.
Neglecting Equipment Calibration
Testing tools like optical power meters and VFLs must be properly calibrated. Using faulty or uncalibrated equipment can give false readings, leading to misdiagnosis and unnecessary cable replacements.
Real-Life Use Cases of Diagnosing Fiber Optic Cable Issues
Home Internet Troubleshooting
A homeowner experiencing intermittent buffering during streaming found that a rodent had gnawed a section of the external fiber. A VFL helped trace the break quickly, and the ISP replaced the damaged section.
Data Center Downtime
In a corporate data center, technicians noticed packet loss during peak hours. OTDR testing revealed a faulty splice caused by a poorly executed maintenance job weeks earlier. A proper fusion splice restored full performance.
Campus Network Instability
A university IT team faced unexplained outages across two buildings. Power meter readings helped confirm signal loss in a buried fiber line, which was later repaired by digging and replacing the damaged trench section.
Frequently Asked Questions
How do I know if my fiber optic cable is damaged?
Loss of internet signal, slow speeds, or complete disconnects often indicate damage. Visual inspections and testing tools like VFLs and power meters can confirm it.
Can I repair fiber optic cables myself?
Yes, minor issues like connector cleaning or replacing accessible cables can be handled with the right tools. For advanced repairs like splicing, a professional is recommended.
What tools do I need to test fiber optic cables?
Basic tools include a visual fault locator, optical power meter, fiber optic light source, and cleaning kit. For deeper diagnostics, an OTDR is highly effective.
What causes fiber optic cables to lose signal?
Signal loss can result from bending, physical damage, connector contamination, poor splicing, or cable aging due to environmental exposure.
How often should fiber optic cables be checked?
In professional settings, regular inspections every 6 to 12 months are common. For home users, check when performance drops or during seasonal maintenance.
Do fiber optic cables wear out over time?
While highly durable, fiber optic cables can degrade over the years, especially if exposed to harsh weather or poor handling practices.
Is it better to replace or repair a damaged fiber cable?
It depends on the severity and location of the damage. Surface-level issues might be fixed, but internal or buried damage often requires replacement.
Conclusion
Diagnosing and troubleshooting fiber optic cables ensures reliable performance and minimizes costly downtime. By understanding common damage causes, performing proper inspections, and using accurate testing methods, users can maintain strong, stable connections. Preventative care, correct installation, and regular maintenance are key to extending the cable’s life. Whether at home or in commercial networks, effective fiber optic cable management keeps your communication systems running at peak efficiency.